Farm Toob Series: Farmyard Playdough
Did you know our Toys That Teach can be used for tons of different educational and DIY projects?! We're introducing this new series with Emily Limer to show you the myriad of ways you can use our figurines!
Farm Toob Series: Farmyard Playdough
Playdough is one of my family’s favorite activities to do together! My kids love to get involved in the whole process - they help me make our homemade dough and love to choose their favorite bits and pieces (and Safari Ltd. animals!) to play with it. Today we are sharing two different playdough recipes that we used to create some farmyard playdough kits! One recipe is for our favorite basic playdough and the other is for a special “dirt” playdough. Read below to learn how you can make both to play with your favorite Safari Ltd. farm animals!
Items Needed:
Ingredients:
Basic Playdough:
2 cups bread flour (all purpose flour is also fine!)
½ cup salt
2 tbsp vegetable oil
3 tsp cream of tartar
2 cups water
Food coloring (for these activities I made a batch of blue and a batch of green!)
Dirt Playdough:
2.5 cups bread or all purpose flour
1 cup ground coffee
¼ cup cocoa powder
3 tsp cream of tartar
2 tbsp vegetable oil
½ cup salt
2.5 cups water
How to:
To make your homemade playdough you will need: a large, deep pan (mine is similar to a wok in shape), a sturdy spoon or spatula, a whisk, all of the ingredients listed above, and parchment paper. The process for making both of these types of dough is the same, though the ingredients and ratios vary. I use bread flour in my playdough recipe because I find that it makes for a softer and stretchier dough, however substituting all purpose flour will work just fine!
Step 1: Combine all ingredients in your pan and whisk to combine. Be sure to break up as many flour lumps as you can while whisking. When I am adding food coloring, I often add the coloring to the water and then pour it into my dough mixture. This helps to spread your color out! Add as much color as you like, but the color will darken some as the dough cooks.
Step 2: Cook on medium heat on your stove top. Stir very frequently (almost constantly). As you stir, scrape across the bottom of your pan with your spoon. The dough will slowly start to form a ball in the center of your pan as you scrape and stir. Continue cooking until the dough ball no longer appears wet. This usually takes 6-8 minutes, but could vary depending on your stove and pan.
Step 3: Lay out a piece of parchment paper and dump the cooked dough ball onto it. Allow the dough to cool in a ball for about 5 minutes. Once it is cool enough to touch, begin to knead the dough with your hands. Knead for about 5 minutes to help smooth out any lumps and soften your dough.
Step 4: Flatten the dough into a pancake (2-3” thick) and cover with another piece of parchment paper. Allow the dough to cool completely. Once totally cooled you can play with it! When you are not playing with your dough, keep it in an air-tight container or zipper bag. Properly stored dough can be used for around 6 months!
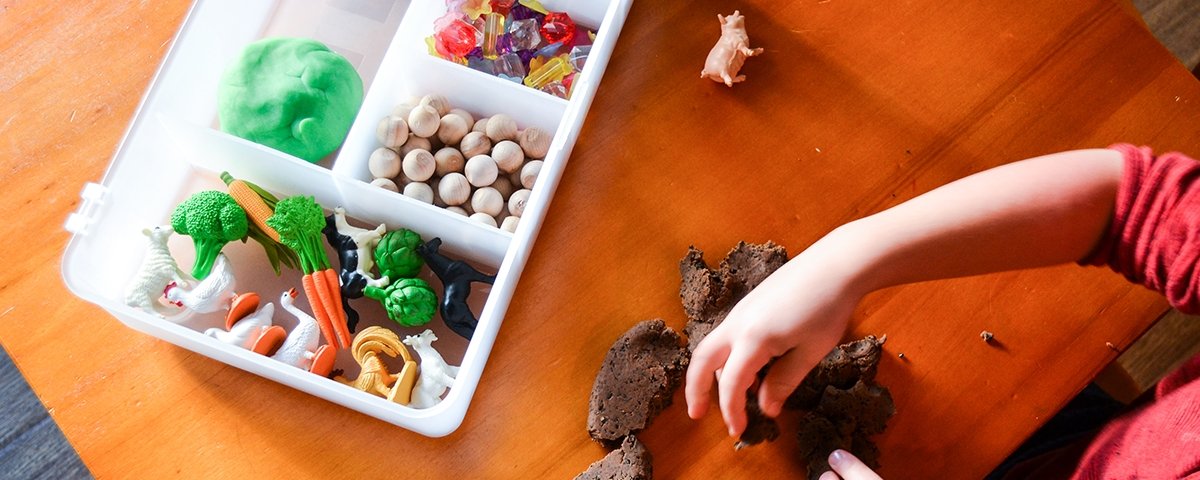
We used green playdough, blue playdough and dirt playdough to create some fun dough kits with our Safari Ltd. Farm Toob and Fruits and Vegetables Toob! Playdough kits are containers that contain different colors of dough and small toys you can use to play with it! There are so many different containers and divided trays you can make work for a playdough tray or kit. My best advice? Use what you have! Most of our kits contain dough, Safari Ltd. Toob animals and small beads, buttons, gems or other materials we keep on hand for crafts. Keeping a set of materials contained in a kit like this makes it easy to set up play whenever your kids are ready!
 Facebook
 Twitter
 Instagram
